
Cause chaos and destruction with various weapons and explosives.

Mass Mayhem 3 is powered by dailygame.org


;) Pressure Variations
Pressure Variations;) Create Oodles of O's with Upside Down Crayons
Create Oodles of O's with Upside Down Crayons;) Triple or Double Stripe Designs
Triple or Double Stripe Designs;) Scribble Designs
Scribble Designs;) Outlining
Outlining;) Create New Colors
Create New Colors;) Sketch Lines
Sketch Lines;) Shiny Artwork
Shiny Artwork;) Crayon Etching
Crayon Etching
 Crayola® colored pencils may be used to draw delicate lines or lay in vibrant, wide, tonal areas. Clean and easily transported, these strong, thick "lead" pencils are ideal for sketching indoors or outdoors.
 Familiar to users as a drawing tool, versatile Crayola® watercolor pencils produce clean, vibrant lines that blend just like traditional colored pencils. They can be combined with water to create beautiful watercolor effects. Draw on wet paper or dry colored areas to add detail, drama and interest. Unique effects and ease of use make watercolor pencils ideal for any setting.

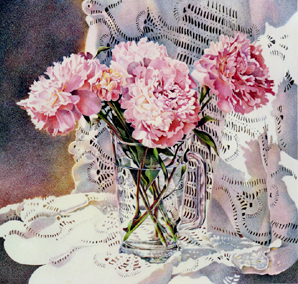
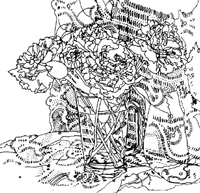 | Step 1. The Line Drawing The first step in creating a new painting is a line drawing that shows placement of objects. A line drawing can be simple outlines of shapes or can be detailed rendering of objects. Then the lines are transferred to paper or board for the final painting. To keep my paper clean, I usually transfer only one area at a time--whichever area I plan to work on next. |
| Step 2. Value Decisions There are many decisions to be made in the creation of a painting - one judgment is about value. To hold the viewer's attention, it is important to have a good range of value. I color the darkest areas first. The lightest value is the white of the paper. With both ends of the value scale established, I can better determine the middle values. | 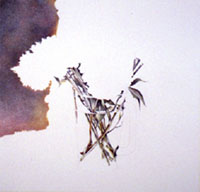 |
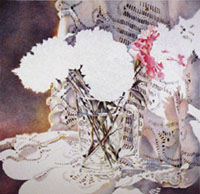
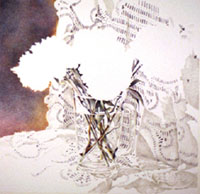 | Step 3. Underpainting Form and volume of the tablecloth surrounding the main subject is created by applying French Gray in a range of values. Once it is a believable likeness portraying form and volume through value, color will be added. This underpainting or grisaille process separates value decisions from color decisions. |
| Step 4. Add Color to the Foundation Subtle colors reflected upon the tablecloth from the flowers and vase are added. Juxtaposed colors - placing colors next to one another - instead of direct layering adds interest. The holes in the tablecloth and details of the vase are defined and darkened with Indigo Blue and Black. | 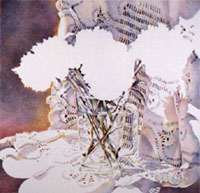 |
 | Step 5. The Main Subject The local color of the main subject is pink. The darkest value of the local color - in this case, Black Cherry - is applied to areas where there is an absence of light. The form and volume of the petals is created by applying color to and/or around each individual petal. |
| Step 6. Play Up the Light To allow light to bathe the scene from the left, selected flower petals are left uncolored. The white of the paper represents strong sunlight. Where soft adjustment of previously applied color is needed, the area can be dabbed with reusable adhesive to gently lift color. | 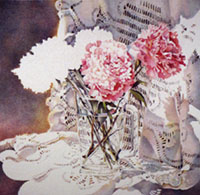 |
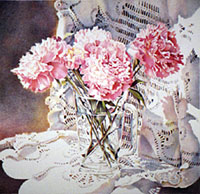 | Step 7. Subtle Adjustments Indigo Blue was added to cool and push back areas that advanced because they were too warm. Complimentary color was added to neutralize both left and right lower corners. | |
 | ||


